If you are wondering how to add shipping zone in WooCommerce, the short answer is that you open the shipping settings, create a zone, pick the places it covers and attach one or more shipping methods to it. The whole job takes about ten minutes once you know what you want to charge.
This guide goes through the full process for a small online shop in Bangladesh. You will plan your zones first, build them step by step, add the right methods, test the checkout and avoid the mistakes that cost shop owners money. At the end there is a simple way to offer free delivery on bigger orders.
What a shipping zone is and why it matters
A shipping zone is a group of locations that share the same delivery options and prices. WooCommerce looks at the address a buyer types at checkout, finds the zone that matches it, and shows only the shipping methods you attached to that zone.
This matters because delivery does not cost the same everywhere. A parcel inside Dhaka city is cheaper to send than one going to a village in Sylhet or Barishal. Without zones, you either charge everyone the same price and lose money on far parcels, or you charge too much and lose the order.
With zones you can:
- Charge a lower fee inside your own city.
- Charge a higher fee for outside-city delivery.
- Offer free pickup for local buyers.
- Block delivery to places you do not serve.
- Show clear prices before the buyer confirms the order.
Plan your delivery areas before you click anything
Most mistakes happen because people open the settings page before they have decided anything. Take ten minutes with a pen and paper first.
- List the places you deliver to. Most Bangladeshi shops start with two groups: inside Dhaka and outside Dhaka.
- Ask your courier for their rate card. Note the price for each group and for each weight band.
- Decide if you add a small handling margin on top of the courier fee.
- Decide whether any area gets free delivery or local pickup.
- Write down any area you will not deliver to at all.
Keep the list short. Three zones are enough for most small shops. Ten zones sound professional but are hard to maintain when the courier changes its prices.
How to add shipping zone in WooCommerce, step by step
Here is the exact path in a normal WooCommerce install.
- Log in to your WordPress admin.
- Go to WooCommerce, then Settings, then the Shipping tab.
- On the Shipping zones screen, click Add zone.
- Type a clear zone name, for example Inside Dhaka. Buyers do not see this name, so write it for yourself and your team.
- In the Zone regions box, choose the country, then the state or district. For Bangladesh, WooCommerce lists districts as states.
- If you need to be more exact, click Limit to specific ZIP/postcodes and enter the codes, one per line.
- Click Add shipping method, choose the type and save.
Repeat for each group you planned. Then check the order of your zones, because WooCommerce reads them from top to bottom and uses the first one that matches.
Zone order is important
If one zone covers all of Bangladesh and sits above a zone that covers only Dhaka, a buyer in Dhaka will match the first one. Put the most specific zone at the top and the widest zone at the bottom. Drag the zones using the handle on the left to change the order, then save.
Choose the right shipping method for each zone
A zone does nothing until it has at least one shipping method. WooCommerce gives you three basic ones.
- Flat rate: one fixed price, for example 60 taka inside Dhaka. This is the most common choice for small shops.
- Free shipping: no charge. You can require a minimum order amount or a coupon.
- Local pickup: the buyer collects the order from your shop or a meeting point.
You can add more than one method to a zone. For example, Inside Dhaka can have a flat rate of 60 taka and a free pickup option. The buyer picks one at checkout.
Setting a flat rate
Click Edit on the flat rate method. Give it a title that buyers will understand, such as Home delivery. Set the cost as a plain number without the currency sign. Choose whether the cost is taxable. Save the changes.
If your courier charges by weight, you can use a simple formula in the cost box, such as a base fee plus an amount per item. Test it with a few sample carts before you go live.
How to add shipping zone in WooCommerce for a Bangladesh shop
Here is an example setup that works for a typical Facebook-page shop that is moving to its own website.
- Zone 1, Inside Dhaka: region Dhaka district. Flat rate 60 taka. Local pickup, free.
- Zone 2, Dhaka division and nearby: regions Gazipur, Narayanganj, Savar area and so on. Flat rate 100 taka.
- Zone 3, Rest of Bangladesh: country Bangladesh. Flat rate 130 taka.
Put zone 1 at the top, zone 2 in the middle and zone 3 at the bottom. A buyer in Mirpur matches zone 1. A buyer in Gazipur matches zone 2. A buyer in Khulna falls through to zone 3.
These prices are only examples. Use the numbers from your own courier contract, and check them again every few months.
Pair your zones with cash on delivery and bKash
Shipping zones decide the delivery fee, but buyers also care how they pay. Most customers in Bangladesh still prefer cash on delivery, and many pay with bKash or Nagad.
Keep these points in mind:
- Show the delivery fee clearly on the cart page, so the total at checkout is no surprise.
- If you accept cash on delivery, remember that failed deliveries cost you the courier fee both ways. A slightly higher fee on far zones can cover this.
- If a buyer pays in advance by bKash, you may want to offer a small delivery discount as a thank you.
- Write your payment options on the product page and in your Facebook page intro.
Test your zones before you tell anyone
A shipping setup that looks fine in the settings can still fail at checkout. Once you know how to add shipping zone in WooCommerce, the next habit to build is testing with real addresses.
- Open your shop in a private browser window.
- Add a product to the cart and go to checkout.
- Enter an address inside your first zone. Check the shipping options and the price.
- Change the district to one in your second zone. The price should change.
- Try a district you do not serve. The checkout should show a message or no method.
- Try a cart with several items to see if weight or quantity rules work as planned.
Fix anything that looks wrong. Test again after every change, even a small one.
Common mistakes when you set up shipping zones
- No method in the zone. A zone with no method shows nothing, and the buyer cannot order.
- Wrong order. A wide zone above a narrow one hides the narrow one.
- Charging too little. Shop owners forget packing material, fuel to the courier point and returns.
- Unclear names. A method called Option 2 confuses buyers. Use words like Home delivery or Store pickup.
- Forgetting the fallback. Add a Rest of country zone so no buyer is left without a price.
- Never updating prices. Couriers change rates. Review your numbers every quarter.
Free delivery above a set amount
Many shops use free delivery as a target. A buyer with a 1,800 taka cart sees that 2,000 taka gives free delivery and adds one more item. That helps both sides. The buyer saves the fee, and you ship a bigger parcel for one courier charge.
In plain WooCommerce, you can do this with the free shipping method set to require a minimum order amount. There is one catch. The paid flat rate will still sit next to the free option, so buyers see both. Some shops are fine with that. Others want the paid option to vanish once the cart is big enough.
To work out the right amount, look at your average order value and set the target a little above it. Check that the profit on the order still covers the courier charge to your farthest zone.
A ready-made option for this: Shipping Rules
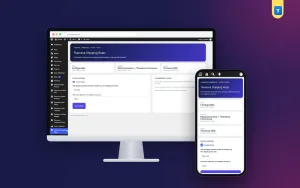
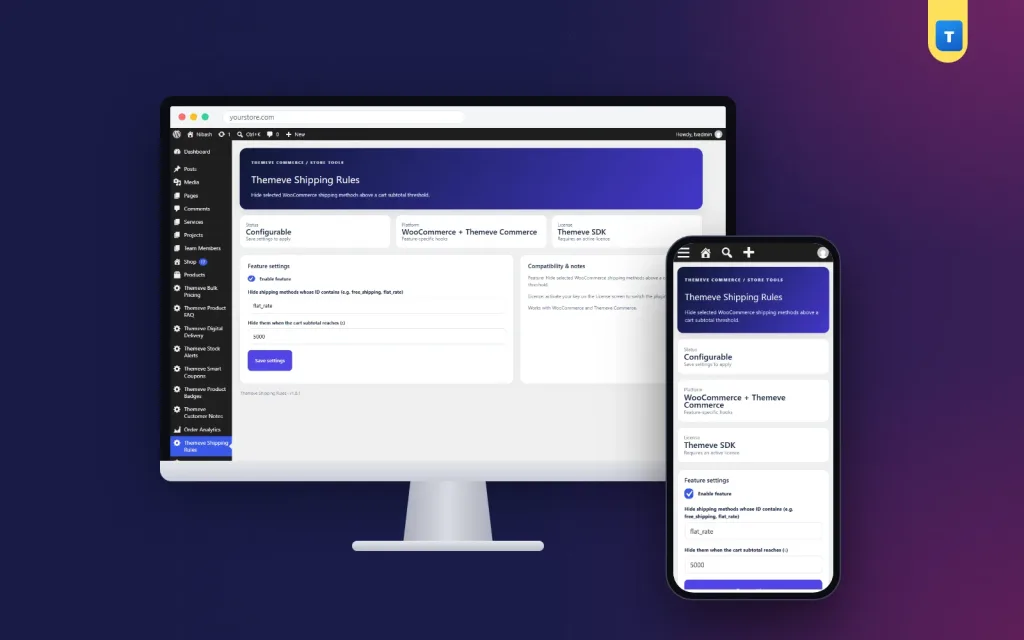
If you want the paid method to disappear automatically once the cart reaches your target, a small plugin can do it. Shipping Rules is a plugin that works on top of the zones you already built. It does not replace them.
Here is what it does:
- You enter an amount based on the cart subtotal.
- You list the shipping methods to hide once that amount is reached, for example flat_rate.
- The checkout updates as the cart changes, so the buyer sees free shipping appear the moment they cross the line.
- An on/off switch keeps your settings when you pause the offer.
- It also works on Themeve Commerce, where delivery becomes free above your amount.
It is one clear store-wide rule, not a full shipping system. Make sure each zone has a free shipping method, so buyers above the amount always have an option left. You can read the full details on the Shipping Rules page.
How to price your delivery fees
Zones only work if the prices behind them are sensible. Here is a simple way to think about shipping cost online store in Bangladesh owners face every week.
- Take the courier fee for the zone and add packing cost per parcel.
- Add a small share for returns and failed deliveries. If one parcel in twenty comes back, spread that loss across all orders.
- Check what other shops charge for the same route. Decide if you pass the whole amount to the buyer, or absorb part of it as a marketing cost.
- Round the final price to a clean number such as 60, 100 or 130 taka.
Your shipping cost online store in Bangladesh buyers see should feel fair, or they will leave at checkout. Some shops build the delivery cost into the product price and offer free delivery everywhere. That can work for light, high-margin items. For heavy or low-margin products, charging separately is safer.
Keep your shipping setup tidy over time
- Write down your zones, methods and prices in one simple document that your team can read.
- Review the numbers each quarter, or whenever the courier announces new rates.
- Before big campaigns such as Eid or Pohela Boishakh, test a full checkout again.
- Read your failed and returned orders. They often point to a zone where the price or area is wrong.
- Keep your delivery time promise honest. Tell buyers one to two days inside the city and three to five days outside, if that is what your courier really does.
A tidy setup saves hours of explaining prices to buyers in messages and calls.
If you want to read more on the technical side, the official WordPress documentation is a good, reliable reference.
Frequently asked questions
How to add shipping zone in WooCommerce for a single country?
Go to WooCommerce, Settings, Shipping, and click Add zone. Choose your country in the regions box, add a flat rate method and save. If you only sell inside one country, you can create a single zone and add a second one only when you need different prices.
Can one zone have more than one shipping method?
Yes. You can add flat rate, free shipping and local pickup to the same zone. The buyer chooses one at checkout.
What happens if the buyer's address matches no zone?
WooCommerce shows that no shipping options are available and the buyer cannot finish the order. Add a wide fallback zone at the bottom of your list to avoid this.
Can I charge by district instead of by country?
Yes. For Bangladesh, WooCommerce treats districts as states, so you can pick them in the zone regions box. For finer control, use postcodes.
Is it possible to hide the paid method when the cart is big?
Yes. Plain WooCommerce shows both the paid and free methods. A plugin such as Shipping Rules can hide the chosen methods once the cart subtotal reaches your amount.
How often should I check my shipping prices?
At least every three months, and every time your courier changes its rate card. Also test a full checkout before any large sale.
Where do I learn how to add shipping zone in WooCommerce if my theme looks different?
The steps are the same on every theme, because shipping zones live in the WooCommerce settings and not in the theme. Only the checkout page design changes from theme to theme.