If more than one person works on your website, you need to know how to use user role editor plugin tools. Without them, owners often pick the easy answer: make everybody an administrator. That solves a small problem today and creates a big risk tomorrow, because an administrator can change or delete almost anything.
This guide explains WordPress roles in plain English, then shows how a role editor works, step by step. You will learn how to give a role one extra permission, how to hide menus that staff do not need, and which mistakes to avoid. The examples fit small shops, news sites and agencies in Bangladesh.
How WordPress roles and capabilities work
Every user on a WordPress site has a role. A role is a named bundle of permissions, and each permission is called a capability. The role decides what the user can see and do in the dashboard.
The standard roles are:
- Administrator: full control over the site.
- Editor: can manage and publish all posts and pages.
- Author: can write and publish their own posts.
- Contributor: can write posts but not publish them.
- Subscriber: can only manage their own profile.
Online shops add roles such as Shop Manager and Customer. Capabilities are things like edit posts, publish posts, upload files or manage categories. The defaults suit many sites, but real teams often need a small change.
Why you may need a role editor
Here are common cases where the default roles do not fit.
- Your author needs to upload images but cannot.
- Your editor must update the menu, but only administrators can do it.
- A shop assistant adds products but should not see Tools or Appearance.
- A freelancer needs access for one week and nothing more.
- A client wants a simpler dashboard with fewer menus.
A role editor plugin gives you a safe way to adjust the role, so you do not hand over administrator access. It keeps the smallest possible number of powerful accounts on your site.
How to use user role editor plugin tools with least access
Before you touch any setting, remember one rule: give every person the lowest role that lets them do their job. Security experts call this least privilege. It protects you from three things:
- Mistakes: a staff member cannot delete what they cannot reach.
- Stolen accounts: if a weak password leaks, the damage is limited to that role.
- Confusion: a shorter menu is easier to learn and harder to misuse.
With this rule in mind, the job becomes clear: start low and add only what is missing.
Step 1: list who does what
Take ten minutes and write a table. In the first column, write each person. In the second, write their tasks. In the third, write the lowest role that could do the tasks.
- List every user in the dashboard under Users.
- Write what each person actually does on the site.
- Match the job to the lowest role.
- Mark any task the role cannot do yet.
- Decide whether to add a capability or to change the role.
Remove accounts that nobody uses. Old accounts are an easy door for attackers.
How to use user role editor plugin settings in a few steps
Every role editor works slightly differently, but the flow is almost the same. Here it is in order.
- Take a backup of your site.
- Install and activate the plugin.
- Open its settings page as an administrator.
- Choose the role you want to change, such as Editor or Shop Manager.
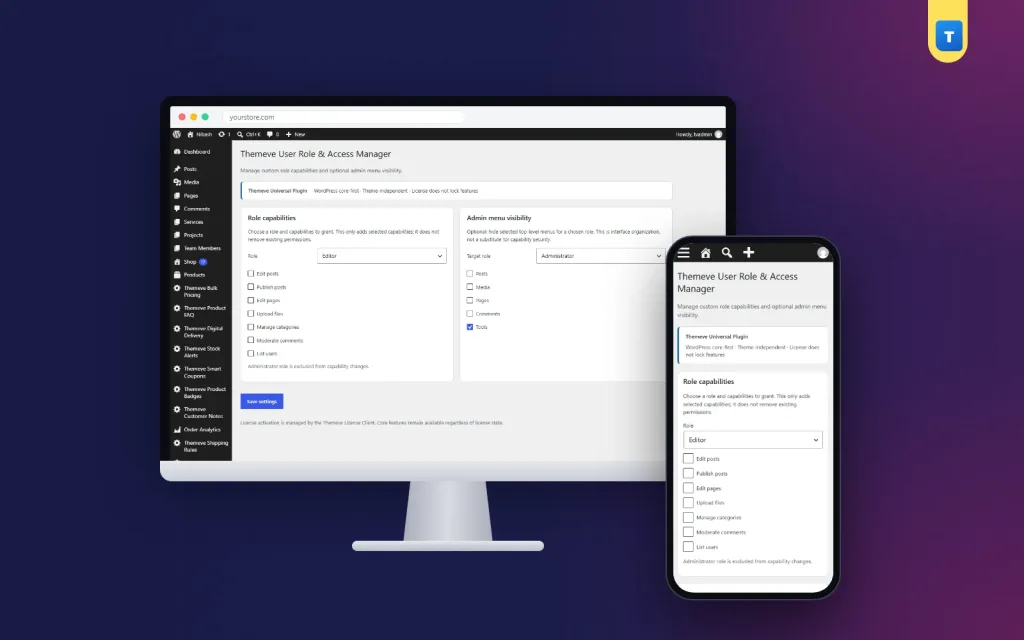
- Tick the capability the role is missing.
- Save the changes.
- Log in as a test user with that role in a private browser window.
- Check that the task now works and that nothing else changed.
Use a test account, not a real staff account, for step seven. You will see exactly what your team sees.
Capabilities worth knowing
You do not need to learn hundreds of capabilities. These seven cover most small-site needs.
- Edit posts: lets the role write and change posts.
- Publish posts: lets the role publish without waiting for approval.
- Edit pages: lets the role change pages.
- Upload files: lets the role add images and documents to the media library.
- Manage categories: lets the role create and edit categories.
- Moderate comments: lets the role approve, reply to and remove comments.
- List users: lets the role see the list of users.
Each extra capability gives every person in that role more power. Add the smallest change that solves the problem, and write down what you changed.
Hide admin menus for a role
The WordPress admin can feel crowded. A writer does not need Tools, Appearance or plugin settings. When you hide those menus, three good things happen.
- The dashboard looks simpler and easier to learn.
- Staff make fewer accidental changes.
- Training takes less time.
To do it, choose the role, then tick the menus you want to hide for it. Administrators still see everything, so you cannot lock yourself out.
Hiding a menu is not a lock
Many beginners miss this point. A hidden menu makes the dashboard cleaner, but it is not a security control. A user who knows the direct address of a page may still reach it if their role allows it. To truly stop an action, keep the capability away from the role.
Think of it this way: hiding is for comfort, and capabilities are for safety. Use both, in the right order.
A ready-made option for owners
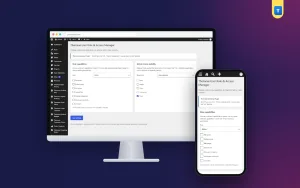
User Role & Access Manager is a simple plugin for these two jobs. You choose an existing role, tick extra capabilities for it and choose which admin menus to hide. It does not ask for code and it has one settings screen under Settings.
Administrators are never limited, so a wrong setting cannot lock you out. The plugin adds capabilities; removing one again is done by hand, for example by your developer, so plan changes carefully. It works on any WordPress site with any theme, and with shop roles too. More details are on the User Role & Access Manager page.
Examples for small businesses in Bangladesh
Here are practical setups that real teams use.
- A Facebook-to-website clothing shop: the shop assistant adds products and replies to comments. Give the Shop Manager role, hide Tools and Appearance, and keep settings for yourself.
- A small news site: reporters get the Author role with permission to upload files. Editors get the Editor role. Only the owner is administrator.
- A coaching centre: a teacher updates notices. Give the Editor role for pages only and hide plugin menus.
- A business with a freelance writer: give Contributor, so every article waits for your review.
In every case the number of administrators stays at one or two.
Testing and reviewing roles
Changes need testing, and roles need review over time.
- Create one test user for each role you changed.
- Log in as that user and try the main tasks.
- Check that forbidden areas stay forbidden.
- Review the user list every three months.
- Remove accounts of people who left.
- Reset passwords of anyone you suspect was careless.
An activity log helps you see who changed what and when. If you ever find an unexpected change, it points you to the account that did it.
When a change does not work
Sometimes you add a capability and the user still cannot do the task. Go through this short list before you give up.
- Log the test user out and in again, so the new role settings load.
- Confirm you changed the correct role, not a similar one.
- Check that the task does not need a second capability. Editing a menu, for example, may need more than one permission.
- Switch off other plugins that also change roles, because two role tools can clash.
- Clear your cache and test again.
- Ask your developer if a theme or plugin adds its own rules.
Most of the time the cause is the first or fourth item. Be patient and change one thing at a time.
Train your team
A role is only useful if people understand it. Spend fifteen minutes with each new staff member. Show them where to write a post, where to upload images and what they will not see. Tell them why: the dashboard is smaller to protect them from accidental changes. Most people like a shorter menu once they know the reason.
Also tell your team never to share passwords. Each person should have a separate account, so you can tell who did what if something goes wrong.
Adding a capability for a short time
Sometimes a person needs a special permission for only a week, for example a helper who updates the menu before a sale. Give the permission, note the date in your register and set a reminder to review it. Because removing a capability is done by hand, plan who will do that and when. A small habit like this stops temporary access from becoming permanent by accident.
Also review roles whenever your team changes. A new hire, a resignation or a change of duties is a good moment to check that each account still has only what it needs. Ten minutes each quarter is enough for a small team, and it keeps the site tidy and safe.
Mistakes to avoid
- Making everyone an administrator. This is the biggest risk.
- Adding many capabilities at once. Add one, test, then add another.
- Skipping the backup. Always keep one.
- Forgetting to write down changes. You will not remember in six months.
- Trusting hidden menus for security. Control capabilities instead.
- Sharing one login between staff. Give each person an account.
- Leaving old accounts active. Delete or downgrade them.
Recommended starting roles
If you are unsure where to begin, use this table in list form. Start with the role on the left and add capabilities only when a real task needs them.
- Owner or manager: Administrator. Keep this to one or two people.
- Chief editor: Editor, with the menu rights they need.
- Staff writer: Author, plus upload files if they add images.
- Freelance writer: Contributor, so you review every article.
- Shop assistant: Shop Manager, with extra menus hidden.
- Customer or reader: Subscriber or Customer.
These are starting points, not rules. Your team may be different, and that is exactly why a role editor exists.
Working with shop roles
Online shops have a few extra points to watch. Shop staff handle orders, customer names, phone numbers and addresses, which is private data. Give access to orders only to people who need it, such as the person who confirms bKash or Nagad payments and arranges courier pickup.
Check these items for a shop team:
- Who may add and edit products?
- Who may see customer details?
- Who may change prices?
- Who may change payment or delivery settings?
- Who may refund an order?
Keep payment and delivery settings with the owner. Staff can work on products and orders without touching them.
Backups and recovery
Role changes are small, but a backup still matters. A mistake in a role setting could remove access to something your team needs. A backup lets you return to the earlier state in minutes.
- Back up the database before you change roles.
- Keep one administrator account untouched, with a strong password.
- Write down the role settings you changed.
- If something breaks, undo the last change first.
- Ask your host for a restore point if you cannot fix it.
If you want to read more on the technical side, the official WordPress documentation is a good, reliable reference.
Frequently asked questions
How to use user role editor plugin without breaking my site?
Take a backup, change one role at a time, add one capability, and test with a separate test user. Keep administrator access safe and never remove it from yourself.
Do I need to know coding?
No. A simple role editor uses tick boxes and menus. You only need to understand what each capability allows.
Can I lock myself out?
A well-made plugin never limits administrators. Even so, keep a backup and an administrator login that you do not change.
What is the difference between a role and a capability?
A role is a group, like Editor. A capability is a single permission, like publishing posts. A role is a bundle of capabilities.
Does hiding a menu make the site secure?
No. It only makes the dashboard simpler. For real protection, limit the role's capabilities.
Where can I learn how to use user role editor plugin tools for shops?
Start with the shop roles, Shop Manager and Customer. Give shop staff only what they need to add products and handle orders, and keep settings for the owner.
Will it slow down my website?
A small role plugin works inside the dashboard and adds almost no load for visitors.